Showing posts with label faux paint techniques. Show all posts

Tuesday, June 21, 2011

Another redo of bad faux wood painting

Well, it seems I am getting more calls to redo bad faux wood painted doors.  I sure would have loved to remember to take the before picture but since I have another person who does the sanding, priming and base coat painting, I forgot to ask him to take the before picture.

The person who had done the previous faux painting used oil based gels.  Not even a year later, the garage doors were totally faded and badly cracked. What is really sad is that it didn't even get sun on it!  The front double doors were cracked all over but not faded.  Go figure.  As I have written on my previous posts, you need to use a water based, exterior base coat.  You can use an eco friendly paint even though it's not as necessary since you are working outdoors. Oil paint is flexible, therefore the heat will make it brittle and cause it to get dull and crack. By using a paint conditioner as my faux painting glaze, I know I have a finish that will last.

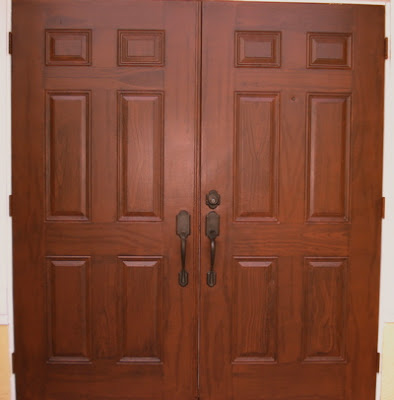
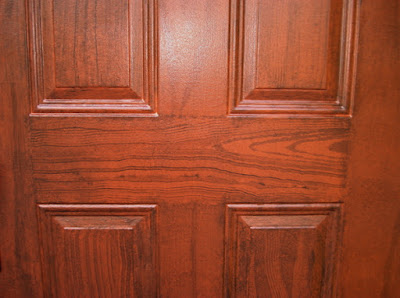
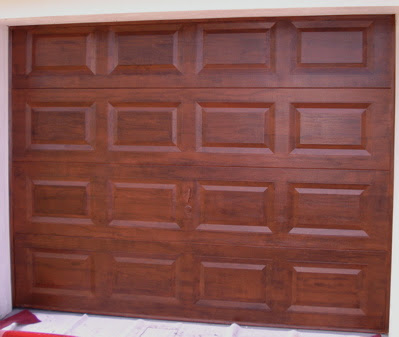
Anyway, here's the pics of how the doors came out. I tried out a couple of new tools and that's why you see more grain than I usually make for faux mahogany. The client was thrilled and said the doors were beautiful.  Especially about the faux grain.  I think these are the tools I will be making to sell with the Faux Wood DVD.  I adjusted the lightness and color on the close up picture of the grain so you can see what it looks like. Any comments are welcomed.

I am going to have to include a faux painting article about this on my website. Or add it to my faux painting tips page.

Faux wood painted on single garage door
Faux wood painted on double front doors

Faux wood closeup of the grain made with new tools

Tuesday, April 26, 2011

Faux painting samples by customers

These are just a few samples of pictures and letters I have been blessed with to receive from customers who have bought the patented (7472450) faux painting system the Lord gave me. To view larger image, click on pictures.

My sister and I had an opportunity to fnally use the Triple S Faux in December. It made our job incredibly easy. I'll definitely be using it on more projects.      

Thanks,  
Sherry


Hi Sandra,


I ordered your painting tools and DVD in order to redo my daughters living room walls.  She had her heart set on the old world parchment look with lots of veins. I have never done any faux painting before but your web site made it look so easy that I gave it a try!
I prayed and prayed that I would be able to make her walls look nice.  Well I am so excited to tell you that IT WORKED!!!
Everyone loves it and my daughter says " mom I catch myself walking upstairs just to look at my pretty walls" !  I look at the painting on the walls and am truely amazed that I did it! Your little poofy pads and palette are wonderful!! I feel so lucky that I found your web site!

I can create all these different faux looks and never fail to be amazed that I did it!  Your video shows exactly what to do,step-by-step. After watching it and practicing on posterboards for about half a day, I was able to paint my first amazing wall! So many people who see my work, want me to do painting for them! I'm still learning but am having fun while I do!
I feel that I have started a profitable career for the price of  $39.99!  Also thanks for being there to answer questions and give suggestions.  You are great and your Triple S faux-painting system is wonderful!

Thank you,
God bless you,
Connie

Hey!  Just wanted to say thanks so much for your wonderful products, we'll be doing another order here again soon.  Attached are some pics of what we've been doing around the house if you can use them.  God bless and thank you so much for honoring Him with your work and website!


Rachel


On January 3rd, 2008 I put my house up for sale.  My neighbor had a couple staying with him whose house burned down 2 months before.  They were not looking to buy at the time, but saw my house and “HAD TO HAVE IT”!

2 months later, they were unable to get financing, so I had an “Open Hose” on a Saturday in March.  3 couple came to look at my house and I had a contract on Monday.  Again, 2 months later, no financing.  This happened for 9 months (4 contracts), Open House…Contract on Monday…No Financing..  Even the couple that I bought the house from 6 years before wanted to buy it back.  Finally, a single women with a large down payment (25%), a good job and a better credit score saw my house and told me she loved everything I did and (again) “had to have it”.
(She bought it for the asking price)

The brickwork in both houses was done with your “Faux Painting Kit”.  After taping off the bricks, I used the “Multi Color Faux Palette” for different color reds, and used the “Poofy Pad” the blend it.

I believe that the painting helped sell my house…

I’ve attached more pix to put in your article (website).

Thanks,
Carla


Monday, April 25, 2011

Patching up another existing faux finish


I was asked earnestly to see if I could fix another faux painted wall that had been damaged by water.  I informed the customer that trying to match an existing faux finish was never an easy job.

What made this project even more difficult was that I didn't know what base coat colors the walls were originally painted nor what colors were used for the
faux finishing. In addition, the faux painting technique that was used was not known either.  But praise the Lord, He guided me through the steps I needed to do.  The customer was quite thrilled because I initially told him that it would be nearly impossible to get the areas to match the original faux finish since I wasn't the artist who painted them.
However, after seeing them in person (the customer only explained the problem over the phone), I was more hopeful that I could fix them. There was large areas that had been spackled with joint compound.  None of the areas had been sanded or painted.

As you can see in the photos, the faux finish was somewhat of an Old World look.  There seemed to be a mixture of faux painting techniques like color washing with a rag of some sort.

So initially I thought I would prime the area and paint it with an off white base coat but after testing a small area, I realized it would not look the same.


The reason was that it seems that the person who originally faux painted the wall, did so on a flat sheen base coat.  The sheen I had was satin, since that is the base coat sheen I usually faux paint with.   After praying a bit and asking for wisdom, I got an idea.  Since I didn't have any flat wall paint with me, I decided to add some white bottled acrylic paint to my colors so that the white would make the paint less transparent. This enabled me to make the section I was fixing blend better with the existing faux finish.
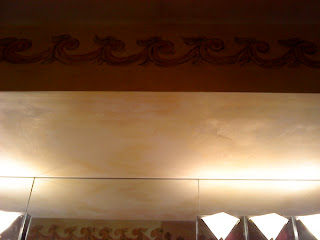
I remembered that once I had done a job where I needed to cover an existing base coat paint because the client hated it.  If I just faux painted over it, the base coat color would still show through. So I did a faux finish color wash but using only paint with no glaze.  That caused the paint I used on top to cover the existing base coat color because the paint was not as transparent because I didn't mix it with a glaze.  This is something you learn quickly when using faux painting glazes.

So I figured I would try to do somewhat of the same thing this time, but I did add a little bit of glaze.  Well, it worked and again, I give all the glory to Christ, who never lets me down.  Since I regularly ask that He alone would open the doors of opportunity to offer my services as a faux finisher, I know that even when it seems impossible, it's not.  Take this tip from me, and learn from a faux painting professional, who has been there, done that!
Friday, September 11, 2009

Faux Painting Tile Project

Bathroom wall painted with faux tile finish in 3 colors

With a faux painting web site to keep up with, I don't have much time to do as many projects as before. Don't get me wrong, I still continue to actually faux paint for profit, but when I refer to projects, I mean my own where I do it for loved ones or for fun. Recently, my mom changed her toilet and now she didn't want the green faux finish I had done many years ago. So I wanted to bless her by taking my time to do a "trompe l'oeil" effect. That's fancy french which means, "trick of the eye". I love the look of tile in a bath but installing real ones is not only expensive, but the mess it creates is not pleasant. I have been in homes where there is tile being installed and the owners can't wait to get the job done. There's a lot of dust from the concrete in the air where they mix the powder they need. Anyway, I figured painting the tile would eliminate the mess and in the future, if my mom wants to change the look, she doesn't have to mess up the walls to take out the old tile. In addition, we could still use the bathroom while I was working, plus, she saved so much money and time, looking for the perfect color in tile.

Well, here's a picture of what I did. And yes, I used the Triple S Faux Painting System that God gave me. I cannot faux paint without this patented system, myself. I do plan to make a video of the steps I took and all the faux finishing techniques I used to achieve this beautiful look. I sent this picture out to my friends and asked them what they thought of my tile work and none of them thought it was paint; they all thought the tiles were real. So I guess I passed the test. Thank you Lord for my first "trompe l'oeil" attempt being a success. At least I think so. What do you think? I would love comments.