Showing posts with label faux painting. Show all posts

Wednesday, April 11, 2018

Idea for Sponge Painting and Ragging a Faux Finish in black and white

A great place to get ideas for faux painting is to look at clothing. Yep, there are a lot of beautiful, colorful and unique prints on blouses and skirts. Some are with designs that can be incorporated onto a wall design. By using a computer, we can see our design and calculate the steps we need to take.

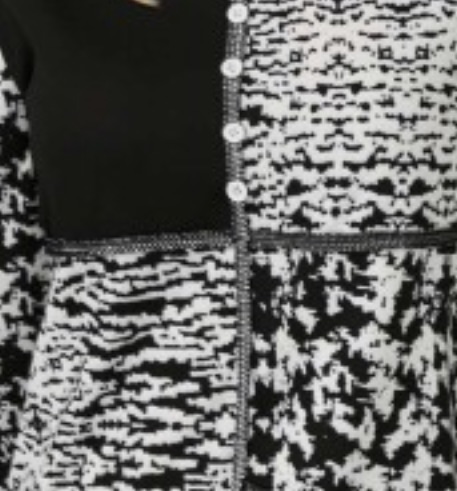
Blouse design selling online
Here's a snapshot of a blouse that is available online. It's pretty and I loved the fact that it wasn't just one solid color. It also gave me the inspiration for faux painting an accent wall using a simple Sponge painting and Ragging technique.

With the Multi Color Faux Palette and Tuck and Gather Tool that comes with our Basic Faux Painting Kit along with a sponge and a rag, it should be very easy to achieve the design I came up with.

I used a program called Pages on my iMac to generate the design. By using a bit of graphics, interest is added to a plain white wall.
We also added a picture of red candle accessories we can add later.


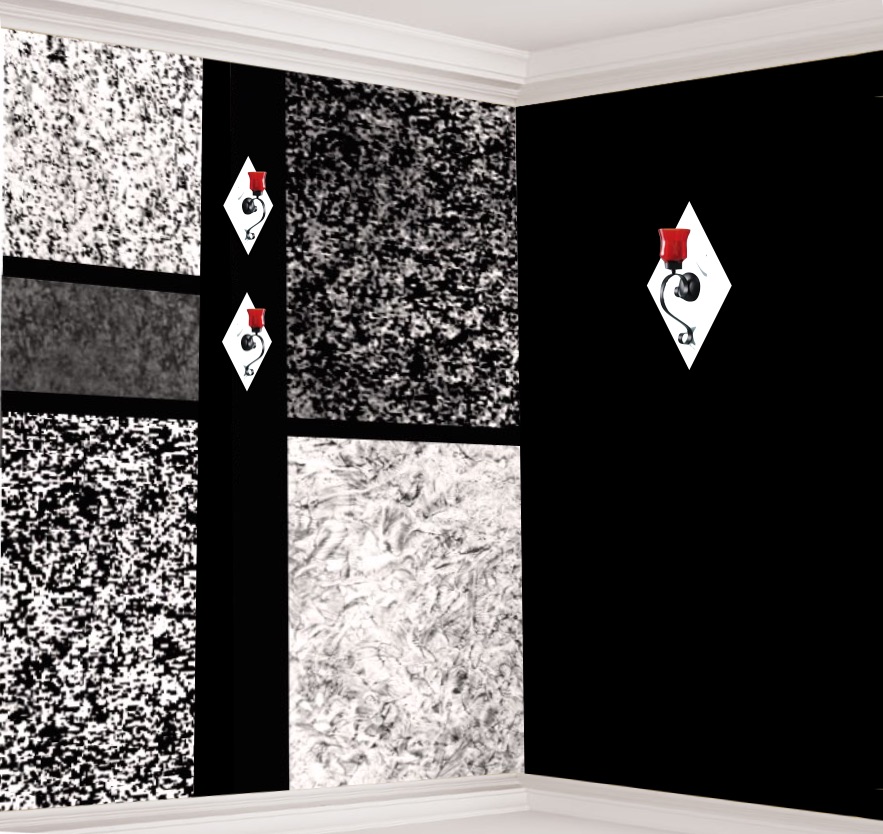
Faux painting design generated on a computer
This look would be great for any room, especially an art room or bathroom. Using a level and tape, we would mask off the areas and then vary each rectangle with a different sponging and ragging pattern.  

We would start faux finishing all the boxes using a sponge. Then for the bottom left box, we would come back and add another layer of the sponging. After that, the top right corner box would get a third layer and finally, the box on the left in the middle would get a 4th layer. The more layers, the less of our white base coat would show. Lastly we faux finish the lower right box adding some ragging on top of the sponging we did.

We will eventually add this design to our Color Suggestions and Idea E-Book that our customers receive when they order any of our kits. 


Thursday, April 13, 2017

Removing rust from metal shed before painting faux wood finish

This metal shed was rusted badly and we decided to remove the rust first before adding our faux wood finish to it.

We wanted to avoid using toxic chemicals so we used baking soda mixed with lemon juice. We applied it to the rust with a chip brush and then let it dry overnight.

Then we took a wet abrasive sponge and began using some elbow juice to remove the rust. We were quite impressed at how the rust came off.

Here's the video we made showing the steps we used. We will post in another blog, the video and steps to add the faux wood finish to the shed.


Removing the rust off the shed first will add the extra durability to the faux bois (french for fake wood). Hope this helps any of our customers who need to remove rust from surfaces before adding the base coat for faux finish.

Tuesday, June 21, 2011

Another redo of bad faux wood painting

Well, it seems I am getting more calls to redo bad faux wood painted doors.  I sure would have loved to remember to take the before picture but since I have another person who does the sanding, priming and base coat painting, I forgot to ask him to take the before picture.

The person who had done the previous faux painting used oil based gels.  Not even a year later, the garage doors were totally faded and badly cracked. What is really sad is that it didn't even get sun on it!  The front double doors were cracked all over but not faded.  Go figure.  As I have written on my previous posts, you need to use a water based, exterior base coat.  You can use an eco friendly paint even though it's not as necessary since you are working outdoors. Oil paint is flexible, therefore the heat will make it brittle and cause it to get dull and crack. By using a paint conditioner as my faux painting glaze, I know I have a finish that will last.

Anyway, here's the pics of how the doors came out. I tried out a couple of new tools and that's why you see more grain than I usually make for faux mahogany. The client was thrilled and said the doors were beautiful.  Especially about the faux grain.  I think these are the tools I will be making to sell with the Faux Wood DVD.  I adjusted the lightness and color on the close up picture of the grain so you can see what it looks like. Any comments are welcomed.

I am going to have to include a faux painting article about this on my website. Or add it to my faux painting tips page.

Faux wood painted on single garage door
Faux wood painted on double front doors

Faux wood closeup of the grain made with new tools

Saturday, October 23, 2010

Should you start your own faux painting business?

I recently gave a class to a gentleman that was looking to not only learning the art of faux painting but also wanted to know how he could start his own decorative painting business.  Since he was totally new to this market, I gave him as much advice as I could.  In deciding what to blog about next, I thought it would be a good idea to submit an article I have written for some ezine publications as well as a new Google Knol I wrote.  The article is similar to the one I have on my website, too.  I look to adding to this post in the future with additional information and tips.  I welcome any other advice from professional faux finishers that can help newbies get started with their own faux painting business.


How much money can one expect to earn?
Just to give you an idea of how much you can earn starting your own business, I charge $2.25 - $8.00 per square feet. With the patented (7472450) Triple S Faux System that the Lord gave me,  I can faux paint a wall that measures 10 ft. high X 10 ft. long (100 square feet) in about 2 hours.  You can do the math.  Most faux painting professionals are charging an average of $3.00 per square feet for simple faux painting finishes.  They charge about double of that for adding a texture to the wall or for sophisticated plaster finishes.  If you are starting out, I would suggest charging about $1.50 a square foot so you can land some jobs (beat out competitors) and then once you gain popularity or word of mouth reputation, up your price.


What tools should you use?
The wonderful thing about embarking on your own journey into the beautiful art of decorative painting today is that there are a lot more faux painting tools, faux finishing classes, and books available than there was when I started out ten years ago.  My suggestion is to start out with the simple faux finishes such as sponging and color blending.  There are many textured faux finishes that you can learn but they are time consuming and the materials can be quite expensive.  After faux painting literally hundreds of walls, I can tell you honestly that 90% of my clients still choose “color blending” or “color washing”, including the “Old World Parchment” look.  Why, because some of the textured faux finishes are too “busy looking” and the cost for faux painting with texture is nearly double than what it is for non-textured faux finishes.  Besides, once you get your foot into the door, then you can offer them.


How I started my faux painting business
I never dreamed that I would be in the business of Faux Painting or Decorative, considering I was a graphic artist by trade. The thought never crossed my mind. I was unaware of how popular this beautiful form of art was becoming, though.  Back in 1996,  there was only limited information on the various faux painting techniques.  Most referred to faux finishing as “sponging” or “glazing”.  In essence, the term was misused and for the most part, still is.  I am referring to the fact that “FAUX” means “FAKE”, therefore, to faux paint a wall means to paint it in a way that makes the wall resemble a specific surface other than just a plain wall, such as “marble”, “wood”, etc.  The sponges or glazes are just tools to achieve a certain effect on the wall.  I’ve read comments on faux painting message boards indicating the perturbation of professional faux finishers when uninformed clients refer to any type of decorative painting (besides murals) as “fauxing”. It used to bother me, too, yet through the years I’ve learned to accept the fact that those unfamiliar with the details of faux painting could care less about the terminology and more about the beauty of decorative painting instead.  So although you have not been professionally faux painting walls, if you learn how to achieve a few easy faux finishing techniques, you can offer your services to friends and family and they won’t care if you’re uninformed with the terms.  As long as you can make their walls look beautiful, you can make some extra income on the side.  Who knows - maybe you’ll end up with your own faux painting business like I did. Start off by painting your own walls, then invite others to see your work.  If they ask how much would you charge to faux paint their walls, give them a relatively low price since you are just starting out and use it as practice.  If you ever plan to start your own faux painting business, you can get quite a few “practices” in and you can begin gathering photos for your portfolio. That’s how my journey began. 

Thursday, August 28, 2008

Faux Painting glazes

I would like to discuss the multitude of faux painting glazes on the market. After 10 years of literally painting hundreds of walls, I am convinced that water based(acrylic) glazes are the best. The oil based ones have a strong odor. I personally use paint conditioner mixed with acrylic paints and make my own glazes. I have read message boards that say the finish is not durable but I beg to differ. In ten years, I have never had any of my past customers complain about that. Even when I have made a mistake (dark lap lines or missed feathering out section) and I want to take off the glaze, it's not easy. I usually have to use some kind of paint thinner and lots of elbow grease. I am talking about just an hour or so when the glaze has dried. So try mixing your own glazes. Read some faux painting articles concerning how to choose your colors for your faux painting projects before you start. Planning is very important before starting anything.