Tuesday, June 21, 2011

Another redo of bad faux wood painting

Well, it seems I am getting more calls to redo bad faux wood painted doors.  I sure would have loved to remember to take the before picture but since I have another person who does the sanding, priming and base coat painting, I forgot to ask him to take the before picture.

The person who had done the previous faux painting used oil based gels.  Not even a year later, the garage doors were totally faded and badly cracked. What is really sad is that it didn't even get sun on it!  The front double doors were cracked all over but not faded.  Go figure.  As I have written on my previous posts, you need to use a water based, exterior base coat.  You can use an eco friendly paint even though it's not as necessary since you are working outdoors. Oil paint is flexible, therefore the heat will make it brittle and cause it to get dull and crack. By using a paint conditioner as my faux painting glaze, I know I have a finish that will last.

Anyway, here's the pics of how the doors came out. I tried out a couple of new tools and that's why you see more grain than I usually make for faux mahogany. The client was thrilled and said the doors were beautiful.  Especially about the faux grain.  I think these are the tools I will be making to sell with the Faux Wood DVD.  I adjusted the lightness and color on the close up picture of the grain so you can see what it looks like. Any comments are welcomed.

I am going to have to include a faux painting article about this on my website. Or add it to my faux painting tips page.

Faux wood painted on single garage door
Faux wood painted on double front doors

Faux wood closeup of the grain made with new tools

Tuesday, May 24, 2011

Faux wood on garage door fix up

I was asked to patch another faux finish. It seems like more and more, customers are calling to fix a job that someone else did.  This time is was a garage door that someone had painted with a faux wood finish.  The paint and glaze was peeling very badly.  Unfortunately, I didn't take a picture of the damaged area before I fix it, therefore, I can't post it.  There was no sense in posting the after picture, either.

But here is a close up picture of the neighbor's garage door that was faux painted by the same company.  As you can see by the picture, the glaze is already started to fade, harden and crack.  That's because the faux finisher used an oil based base coat and oil based glaze to faux paint the wood finish.

I spoke to a professional at a paint store and they explained that you should never use oil for outdoors because oil becomes brittle from the sun.  Water based paints are more flexible and expand differently with the heat. Therefore, they are a better option for exterior surfaces.

Why do some faux painters use oil glaze?
The open time for oil glazes is a whole lot longer than it is for water based glazes.  That's why some professionals prefer to use them.  However, as you can see by the picture, they don't hold up very well outdoors because of the sun.  So if your doors get a lot of exposure to the sun, you will be very sorry if you resort to using oil paints and glazes, in order to get the open time.  Besides, water based paints are usually more eco friendly paints.

How to faux paint wood grain with water based glazes
Using water based faux painting glazes can be difficult outside, especially if you are working directly in the sun.  The open time is decreased due to the heat.  Working in the shade is better, however, sometimes it's not an option.  Therefore, creating the faux wood effect quickly is the ideal solution.  Stay posted as we continue to develop our faux wood DVD.  The more I paint, the better ideas I am given by the Lord.

Tuesday, April 26, 2011

Faux painting samples by customers

These are just a few samples of pictures and letters I have been blessed with to receive from customers who have bought the patented (7472450) faux painting system the Lord gave me. To view larger image, click on pictures.

My sister and I had an opportunity to fnally use the Triple S Faux in December. It made our job incredibly easy. I'll definitely be using it on more projects.      

Thanks,  
Sherry


Hi Sandra,


I ordered your painting tools and DVD in order to redo my daughters living room walls.  She had her heart set on the old world parchment look with lots of veins. I have never done any faux painting before but your web site made it look so easy that I gave it a try!
I prayed and prayed that I would be able to make her walls look nice.  Well I am so excited to tell you that IT WORKED!!!
Everyone loves it and my daughter says " mom I catch myself walking upstairs just to look at my pretty walls" !  I look at the painting on the walls and am truely amazed that I did it! Your little poofy pads and palette are wonderful!! I feel so lucky that I found your web site!

I can create all these different faux looks and never fail to be amazed that I did it!  Your video shows exactly what to do,step-by-step. After watching it and practicing on posterboards for about half a day, I was able to paint my first amazing wall! So many people who see my work, want me to do painting for them! I'm still learning but am having fun while I do!
I feel that I have started a profitable career for the price of  $39.99!  Also thanks for being there to answer questions and give suggestions.  You are great and your Triple S faux-painting system is wonderful!

Thank you,
God bless you,
Connie

Hey!  Just wanted to say thanks so much for your wonderful products, we'll be doing another order here again soon.  Attached are some pics of what we've been doing around the house if you can use them.  God bless and thank you so much for honoring Him with your work and website!


Rachel


On January 3rd, 2008 I put my house up for sale.  My neighbor had a couple staying with him whose house burned down 2 months before.  They were not looking to buy at the time, but saw my house and “HAD TO HAVE IT”!

2 months later, they were unable to get financing, so I had an “Open Hose” on a Saturday in March.  3 couple came to look at my house and I had a contract on Monday.  Again, 2 months later, no financing.  This happened for 9 months (4 contracts), Open House…Contract on Monday…No Financing..  Even the couple that I bought the house from 6 years before wanted to buy it back.  Finally, a single women with a large down payment (25%), a good job and a better credit score saw my house and told me she loved everything I did and (again) “had to have it”.
(She bought it for the asking price)

The brickwork in both houses was done with your “Faux Painting Kit”.  After taping off the bricks, I used the “Multi Color Faux Palette” for different color reds, and used the “Poofy Pad” the blend it.

I believe that the painting helped sell my house…

I’ve attached more pix to put in your article (website).

Thanks,
Carla


Monday, April 25, 2011

Patching up another existing faux finish


I was asked earnestly to see if I could fix another faux painted wall that had been damaged by water.  I informed the customer that trying to match an existing faux finish was never an easy job.

What made this project even more difficult was that I didn't know what base coat colors the walls were originally painted nor what colors were used for the
faux finishing. In addition, the faux painting technique that was used was not known either.  But praise the Lord, He guided me through the steps I needed to do.  The customer was quite thrilled because I initially told him that it would be nearly impossible to get the areas to match the original faux finish since I wasn't the artist who painted them.
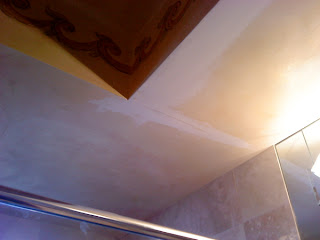
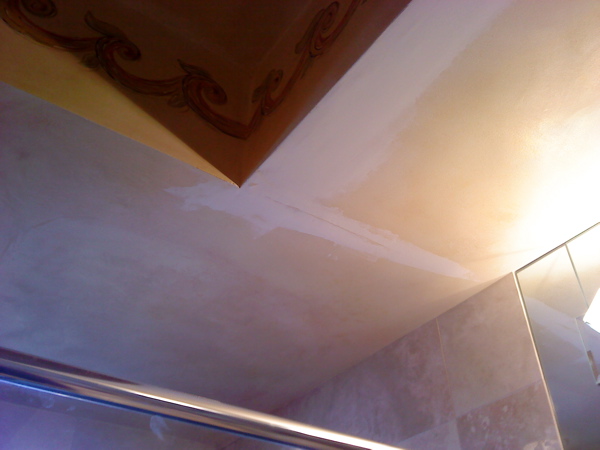
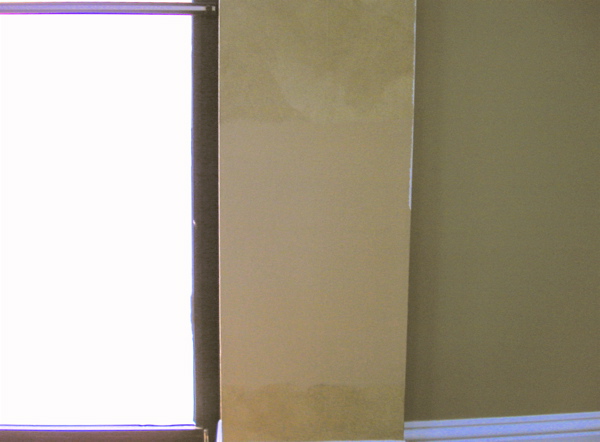
However, after seeing them in person (the customer only explained the problem over the phone), I was more hopeful that I could fix them. There was large areas that had been spackled with joint compound.  None of the areas had been sanded or painted.

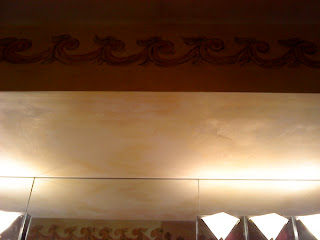
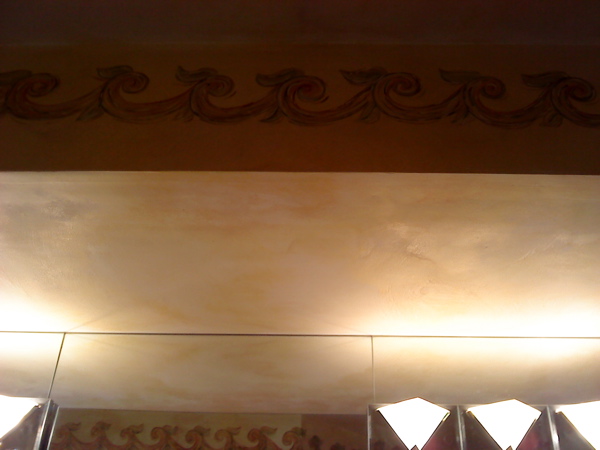
As you can see in the photos, the faux finish was somewhat of an Old World look.  There seemed to be a mixture of faux painting techniques like color washing with a rag of some sort.

So initially I thought I would prime the area and paint it with an off white base coat but after testing a small area, I realized it would not look the same.


The reason was that it seems that the person who originally faux painted the wall, did so on a flat sheen base coat.  The sheen I had was satin, since that is the base coat sheen I usually faux paint with.   After praying a bit and asking for wisdom, I got an idea.  Since I didn't have any flat wall paint with me, I decided to add some white bottled acrylic paint to my colors so that the white would make the paint less transparent. This enabled me to make the section I was fixing blend better with the existing faux finish.

I remembered that once I had done a job where I needed to cover an existing base coat paint because the client hated it.  If I just faux painted over it, the base coat color would still show through. So I did a faux finish color wash but using only paint with no glaze.  That caused the paint I used on top to cover the existing base coat color because the paint was not as transparent because I didn't mix it with a glaze.  This is something you learn quickly when using faux painting glazes.

So I figured I would try to do somewhat of the same thing this time, but I did add a little bit of glaze.  Well, it worked and again, I give all the glory to Christ, who never lets me down.  Since I regularly ask that He alone would open the doors of opportunity to offer my services as a faux finisher, I know that even when it seems impossible, it's not.  Take this tip from me, and learn from a faux painting professional, who has been there, done that!

Monday, March 14, 2011

Patching up a wall painted with a faux finish.

Painter tested out new color for walls on faux finish....argh!
I had faux painted some walls and concrete columns at the church I serve at in an Old World Parchment faux finish.  The base coat I had used was an eggshell sheen.  I used the technique I have developed specifically for faux painting the Old World on Eggshell, since it is different than a satin base coat.  The leaders decided to paint the sanctuary again, leaving the walls that were faux painted as is.  Unfortunately, the painter decided to test out the new color on a couple of the faux painted columns.  I couldn't believe that he did that.  In addition, there were areas that were damaged due to moisture and they had to patch them with spackle.  I was asked faux paint the areas to match the original faux finish I had done.  "What a challenge" I said to myself.  "This is really going to be fun".

Sometimes it is actually easier to faux finish a whole wall over again than it is to patch an area.  The reason is that the edges tend to look harsh and you can see where the wall was patched up.  However, to paint these columns all over again would take time. To make matters more challenging, I didn't have the original paint that I had used to mix my glaze, either.  The reason being was that I had done the faux finishing many years ago, when I didn't do very much faux painting. Another person was in charge of the project and they bought the paint to mix the glaze and neither of us wrote the color down.

Well, praise God, after praying (which is the Most Important Faux Painting Tip) and relying on the wisdom I received, I am so happy to say that I believe the patch work was a success.  The pastor was very pleased and most cannot tell that there was any fixing done in the first place.

First I painted the patched area with a satin base coat that was similar to the original, since the church didn't have the original can. I left a ragged edge where it butted up to the faux finish that remained intact.  I did the same for the side of the column where the spackle was used.  Usually I would prime the area first but I didn't need to this time.

Next, I mixed my glaze and after pressing the poofy pad onto the palette, I pounced the color on the base coat, carefully blending the edges as best as possible.


It did one more layer of glaze to get the right intensity. I did have to add just a tad of another color on top to get the perfect color.  It took less time than I expected.

Finished patch of Old World Faux 
One thing I had to keep in mind was that the color does darken once the glaze is dry, so even though it seemed super light at first, I only had to add one extra layer.

There was a total of 3 columns that I had to fix and I have included before and after picture of 2 of the columns I had to patch up.  As you can see, the match was very close.  Pictures never do justice and I have to admit that in person, the patch work looks very similar to the original Old World Parchment I did.


Wednesday, February 16, 2011

Progress - Faux Painting projects, contd.


French doors with faux wood finish 
Faux Wood DVD 
A got a request to faux paint another double garage door and a set of french doors. It couldn't have come at a better time since I am working on the Faux Wood DVD that I pray, by the grace of God, will be available this year.  As with any job, there are always new challenges.  I had never did a faux wood finish on french doors with oval glass fixtures in them.  I am so glad that I have not limited myself to using the wood graining tools that you have to rock to get the grain. With the limitation of space, I would never have been able to get the tool to work.  

Working in the sun was not too bad at this time of year, early February.  The last time I faux painted doors like wood, it was in the late summer and it was a killer.  I realized while doing that job that using the flat brushes to get the grain was not working either. The main reason being that the sun was drying out the glaze about 2 minutes after applying it!  There was zilch open time. I was getting a blotchy look, too. Although real wood has a variety of darks and lights, the rich look of mahogany or beech wood was being lost.  I admit that I was overwhelmed with the predicament to finish the job with excellence, yet not take days to fix the problem of the blotchiness. So as usual, by the grace of the Holy Spirit, I prayed and asked for wisdom and HELP.  God is so good...He answered as usual.  

To my amazement and delight, I achieved the faux wood finish using just the Multi Color Faux Palette and Poofy Pad; hitting the edges with a chip brush.  I even added the grain and knots with the Poofy Pad.  God does work all things for good to those who love Him, even non-calculated decorative painting problems....lol.  

So with this last job, I finished in record time.  Both the double doors and double french doors were done in one day.  Of course I am referring to the time spent with the faux finishing technique, not including the additional time to base coat paint the surfaces with environmental friendly paint.  

Unfortunately, with this great discovery, I have to add an additional video section to the DVD that shows how to faux paint doors in the sun as opposed to what I have filmed for painting cabinets or inside doors.  In addition, since some people like a lot of heavy looking grains or knots in their faux wood, I am praying about a new tool that the Lord gave me, to achieve this without the difficulty of using the wood graining tool that exists....even if it does rock...lol